Keel project
 |
| Beginning of the Keel project |
When I re-finished the bottom of the boat ( ) I noticed that the keel joint didn’t look that great but decided to leave that for a rainy day/month. Over the next couple of years I tried to fix the keel joint but it just got worse. When the boat was in the water it would leak into the bilge and when out of the water the bilg water would leak out the keel through the keel bolts. What to do, what to do!!!!!!
I started out on the internet looking for info on my specific boat but didn’t find too much. My boat has a unique keel design as you will see.
I did find a good web-site about a Guy who had a yard re-do his Keel. You can check out his web-site at http://www.wbryant.com/StellaBoat/hauls/0811/index.htm
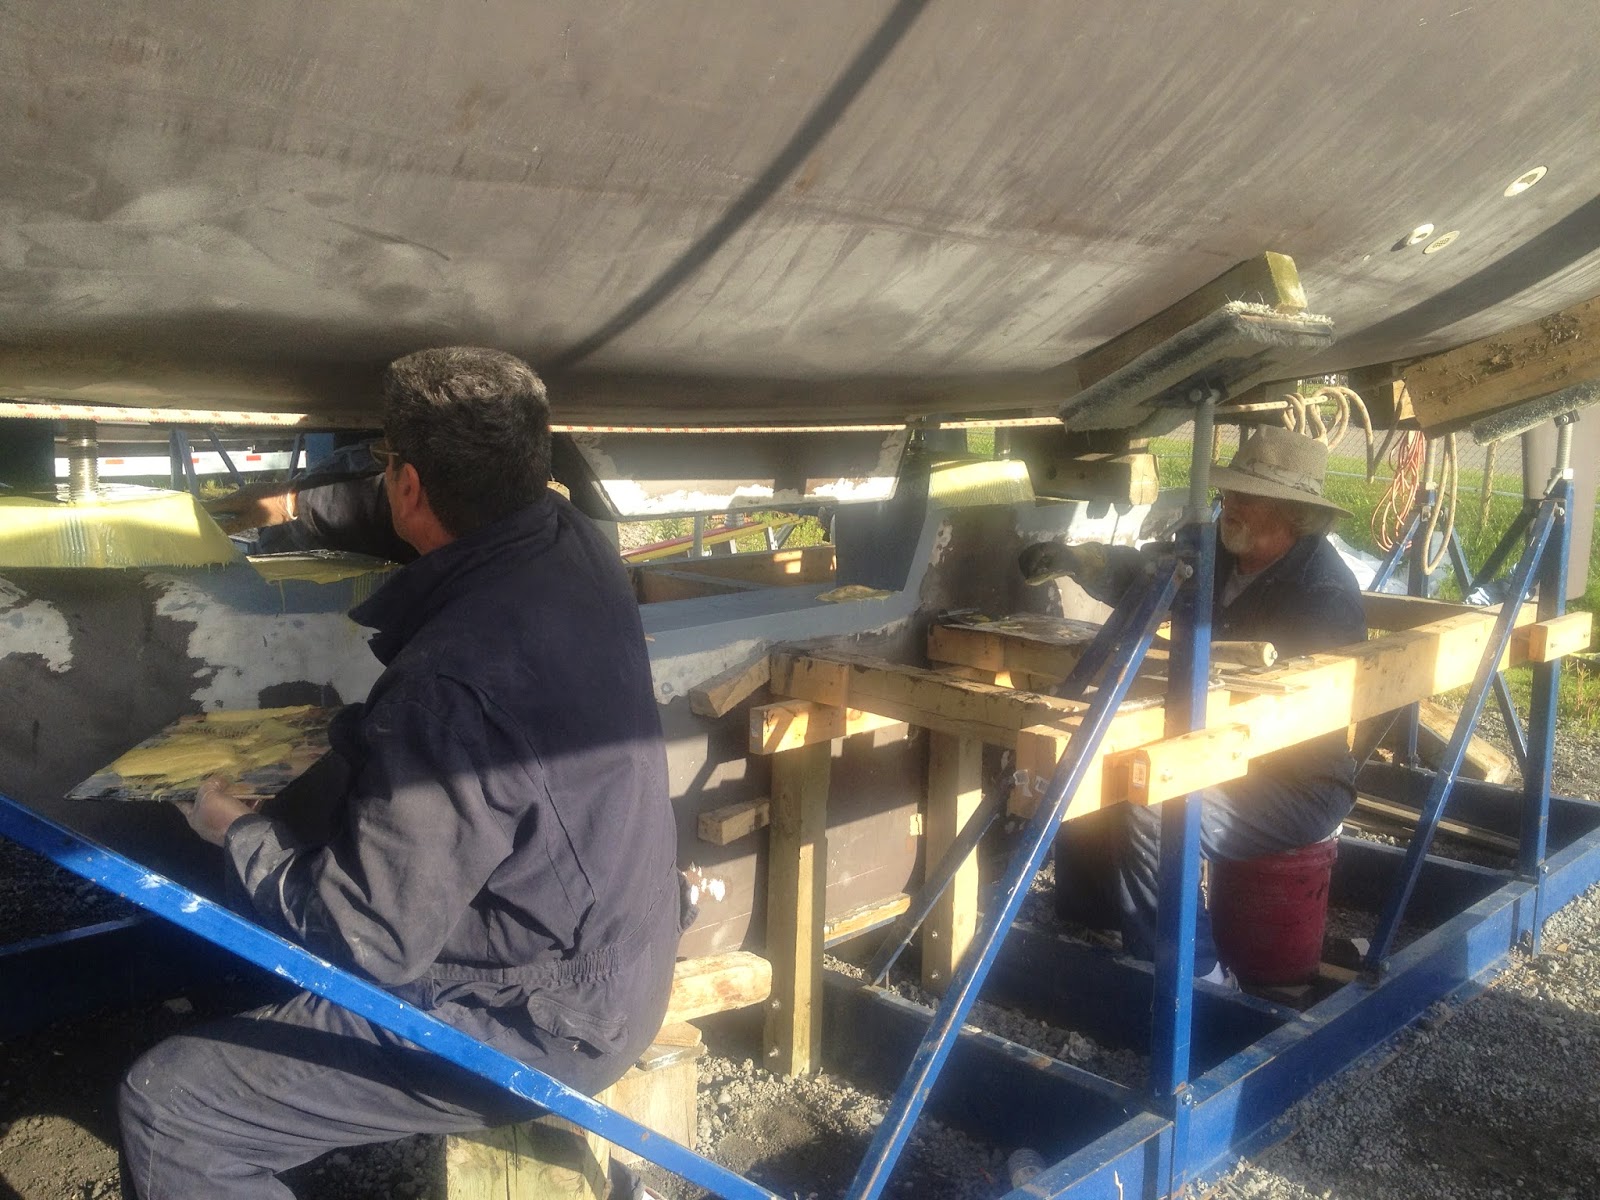
The first order of business was to come up with a way to hold the 8000lb keel upright once it was separated from the boat. I made up a cribbing system inside my cradle out of 4x4’s and 2x6 wood.
 |
| Wood frame to hold Keel once separated |
 |
| Shoal draft Keel is 8000 lbs |
Once I had all the Keel joints, that I could access, cut and all the Keel bolts off it was time to bring in the Travel Lift and separate the Keel. Just a note here, I did this project in early May so I had full access to the lift. Well, after an hour of hammering on the Keel, driving wedges into the cut joints and hammering on the keel bolts it still would not come apart. Back to the drawing board!!!
I went back and re read the Stella Blue web site. On the site they talk about how they made up a Hole saw extension to drill out the epoxy around the keel bolts. So off I go to my Dads with a 1.1875 hole saw and a piece of pipe in hand. My Dad has a small bench top lathe and acetylene torch. After 8 hours I returned to the boat with an extension drill in hand. I drilled out the epoxy around 5 of the 6 bolts. The 6th bolt is under the engine and not accessible. Time for a re-watch with the Travel lift.
This time the keel separated from the boat. We placed 6x6s on top of the keel and set the boat back down on the Keel. We also took two halyards and tied them off to ground anchors on either side of the boat to stabilize the boat. In retrospect the keel bolts were the only thing holding the keel on. After I had the keel separated I could see that the entire top of the keel was covered in rust. What happens with an Iron Keel over time and once moisture gets in, rust forms and eventually breaks away from the Keel. There was still a very thin layer of rusted steel adhered to the epoxy on the bottom of the boat.
 |
| Boat and Keel finally separated. |
The next step was to clean both the top of the Keel and the bottom of the boat. The cleaning process involved grinding all the old epoxy off the bottom of the boat and rust from the top of the Keel.This took about two full days and was the worst part of the job. Once I had all surfaces cleaned, I applied 3 coats of Interprotect barrier coat to both surfaces.
 |
| No its not bottom paint. That's grinding dust! |
 |
| The Captain looks pleased but the First Mate isn't. |
The next step was the bedding party. If you haven’t read Stella Blues web site the process involves 3 parts. 1st - separation, 2nd - re-bedding of the Keel to the boat and 3rd - sealing.
The bedding process involves applying epoxy to the top of the Keel and putting the keel back on the boat and letting it set. Once it is set you then drop the Keel again. You now have a perfect match/fit between the Keel and Boat surfaces. I used Pro-set epoxy as well. Sounds simple but it wasn’t that’s why there are no pictures. !!!!!!!!
After separating and cleaning all surfaces of tape and releasing agent it was time to seal the Keel to the Boat. Through out this project I was trying to decide what product I was going to use as a sealer. 3M- 5200, 3M-4000, Epoxy ????????. So I came to the conclusion that I would use 3M-5200.
So off to Toronto I go to get the 5200 at Composite Canada http://www.compositescanada.com/. When I was there I was talking to Monty about my project and he suggested a different sealing agent, G -Flex by West Systems http://www.westsystem.com/ss/g-flex-epoxy/ . He told me it was stronger and more flexible then 5200, SOLD.
 |
| G flex by West Systems. Love this stuff! |
Next was the sealing party. I walked the docks and found a few seasoned sailors and set a date for 7am the next morning to but Zingara back together. The hole sealing process took about 3hrs.
 |
| Tag team |
 |
| looking good. |
 |
| Jenot mixing the G flex |
 |
| Gord applying the G flex |
 |
| My back is killing me, suck it up! |
 |
| Bill lining her up |
 |
| Touch down |
The only thing that was left to do was re-fair the keel joint and paint the bottom.
This project took me about 4 weeks to complete and cost me about 2 boat units. I have read and heard that if done by a yard it would have cost between 12 to 15 boat units.
Special thanks to the Keel Crew, Jenot, Moira, Gord, Robert, Terry, Bill, Charlie, Keenan, Vicki and Dad.
 |
| Testing out my work! The end Until the next project which will be the Anchor Locker
|
 |
| This is one of the two wings that is recessed 3.5 inches into the boat. This was the hardest to clean as well as apply the the epoxy. |
 |
| Grinding, Grinding and more grinding. |
 |
| Turning extension tube for keel bolt drill. |
 |
| Keel and boat surface cleaned and ready for bedding. |
 |
| nice and clean |
 |
| This is a picture of the Keel and boat bedded together. The black stull is the Pro-set epoxy. This was the most expensive part of the project. |
 |
| Old Man winter just would not cooperate. I had to tarp the Keel and add heaters to make sure the epoxy set. I felt it for three day like this to make sure it was cured before I separated the keel. |
 |
| Front of keel after separation. Lots of rust. |


No comments:
Post a Comment