Feet up at Foxy's Bar, BVI'S

Feet up at Foxy's Bar, BVI'S

Monday, November 24, 2014

Re-bedding and re-sealing of Zingara's Keel

Well its been a long time since my last blog but the dream is still alive and the projects have been continuing on Zingara. The big projects include, refinishing the floors and adding additional storage under the floors. The anchor locker was also cut out and increased in size.  I also separated the keel and re-bedded and re-sealed it as well as many smaller projects.

Keel project


Beginning of the Keel project

 
When I re-finished the bottom of the boat ( ) I noticed that the keel joint didn’t look that great but decided to leave that for a rainy day/month. Over the next couple of years I tried to fix the keel joint but it just got worse. When the boat was in the water it would leak into the bilge and when out of the water the bilg water would leak out the keel through the keel bolts. What to do, what to do!!!!!!

I started out on the internet looking for info on my specific boat but didn’t find too much. My boat has a unique keel design as you will see.
I did find a good web-site about a Guy who had a yard re-do his Keel. You can check out his web-site at http://www.wbryant.com/StellaBoat/hauls/0811/index.htm

The first order of business was to come up with a way to hold the 8000lb keel upright once it was separated from the boat. I made up a cribbing system inside my cradle out of 4x4’s and 2x6 wood.
Wood frame to hold Keel once separated


Shoal draft Keel is 8000 lbs

 
Next was how to separate the keel from the boat. The Keel on a 40 hunter is not a straight surface as was Stella Blue. Someone decided to make this keel as complex as possible. I started out with a small grinder and progressed to a Saws All. 

Once I had all the Keel joints, that I could access, cut and all the Keel bolts off it was time to bring in the Travel Lift and separate the Keel. Just a note here, I did this project in early May so I had full access to the lift. Well, after an hour of hammering on the Keel, driving wedges into the cut joints and hammering on the keel bolts it still would not come apart. Back to the drawing board!!!

I went back and re read the Stella Blue web site. On the site they talk about how they made up a Hole saw extension to drill out the epoxy around the keel bolts. So off I go to my Dads with a 1.1875 hole saw and a piece of pipe in hand. My Dad has a small bench top lathe and acetylene torch. After 8 hours I returned to the boat with an extension drill in hand. I drilled out the epoxy around 5 of the 6 bolts. The 6th bolt is under the engine and not accessible. Time for a re-watch with the Travel lift.

This time the keel separated from the boat. We placed 6x6s on top of the keel and set the boat back down on the Keel. We also took two halyards and tied them off to ground anchors on either side of the boat to stabilize the boat. In retrospect the keel bolts were the only thing holding the keel on. After I had the keel separated I could see that the entire top of the keel was covered in rust. What happens with an Iron Keel over time and once moisture gets in, rust forms and eventually breaks away from the Keel. There was still a very thin layer of rusted steel adhered to the epoxy on the bottom of the boat.


Boat and Keel finally separated.

                                                          
The next step was to clean both the top of the Keel and the bottom of the boat. The cleaning process involved grinding all the old epoxy off the bottom of the boat and rust from the top of the Keel.This took about two full days and was the worst part of the job. Once I had all surfaces cleaned, I applied 3 coats of Interprotect barrier coat to both surfaces.


No its not bottom paint. That's grinding dust!


The Captain looks pleased but the First Mate isn't.

The next step was the bedding party. If you haven’t read Stella Blues web site the process involves 3 parts. 1st - separation, 2nd - re-bedding of the Keel to the boat and 3rd - sealing.

The bedding process involves applying epoxy to the top of the Keel and putting the keel back on the boat and letting it set. Once it is set you then drop the Keel again. You now have a perfect match/fit between the Keel and Boat surfaces. I used Pro-set epoxy as well. Sounds simple but it wasn’t that’s why there are no pictures. !!!!!!!!

After separating and cleaning all surfaces of tape and releasing agent it was time to seal the Keel to the Boat. Through out this project I was trying to decide what product I was going to use as a sealer. 3M- 5200, 3M-4000, Epoxy ????????. So I came to the conclusion that I would use 3M-5200.

So off to Toronto I go to get the 5200 at Composite Canada http://www.compositescanada.com/. When I was there I was talking to Monty about my project and he suggested a different sealing agent, G -Flex by West Systems http://www.westsystem.com/ss/g-flex-epoxy/ .  He told me it was stronger and more flexible then 5200, SOLD.

G flex by West Systems. Love this stuff!

Next was the sealing party. I walked the docks and found a few seasoned sailors and set a date for 7am the next morning to but Zingara back together. The hole sealing process took about 3hrs.

Tag team


looking good.


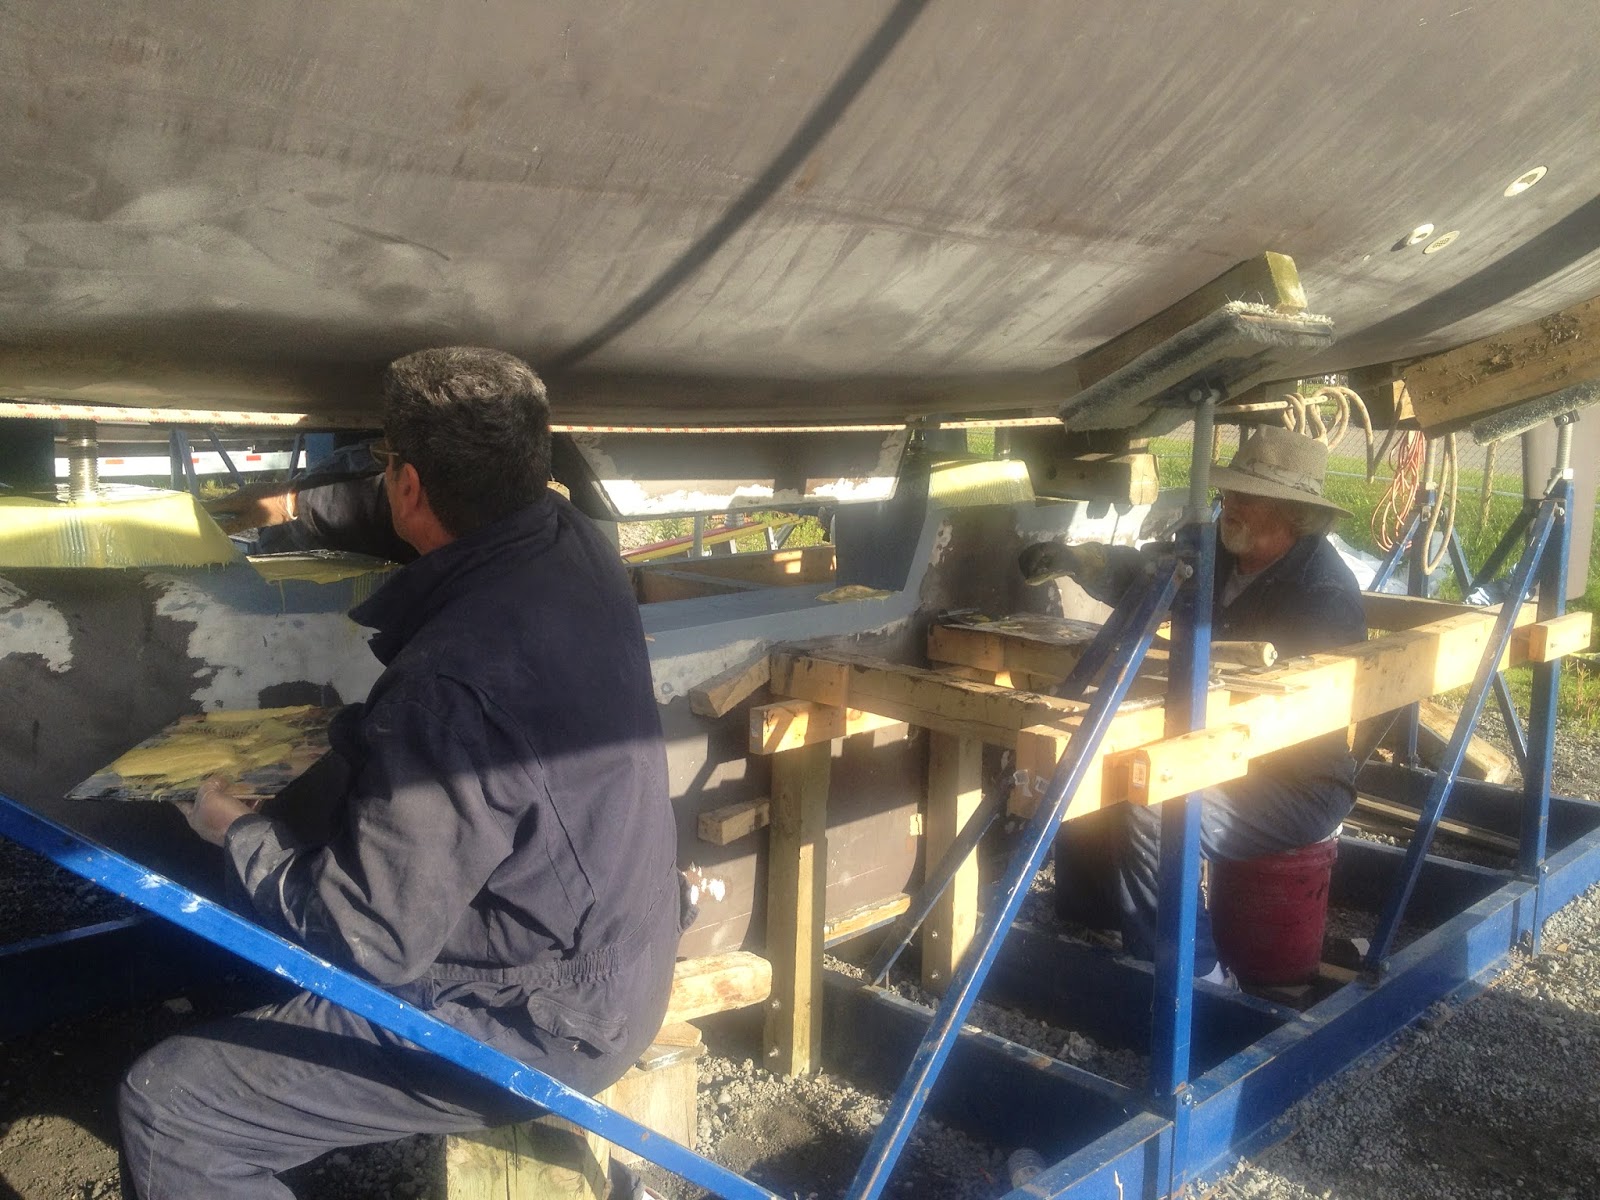
Jenot mixing the G flex 
Gord applying the G flex

 
My back is killing me, suck it up!
It took about 35 to 40 minutes to apply the G-Flex.  The working time was about an hour but the temperature was about 55 degrees so I think we had probably 11/2 hrs. to work with it.
Bill lining her up
 

Touch down


I know someone will ask about the torque that I tightened the keel bolts to.  All I can say is there were to guys on the end of a 5' bar, sliding all over the floor, given her all we had.

The only thing that was left to do was re-fair the keel joint and paint the bottom.
This project took me about 4 weeks to complete and cost me about 2 boat units. I have read and heard that if done by a yard it would have cost between 12 to 15 boat units.

Special thanks to the Keel Crew, Jenot, Moira, Gord, Robert, Terry, Bill, Charlie, Keenan, Vicki and Dad.


Testing out my work!

The end
Until the next project which will be the Anchor Locker


Hear are a few more pictures that I found on my old cell phone.

This is one of the two wings that is recessed 3.5 inches into
the boat. This was the hardest to clean as well as apply the
the epoxy.

Drilling around Keel bolts
Grinding, Grinding and more grinding.
 
Turning extension tube for keel bolt drill.
 
Keel and boat surface cleaned and ready for bedding.
nice and clean
 
This is a picture of the Keel and boat bedded together. The
black stull is the Pro-set epoxy.  This was the most expensive
part of the project.
Old Man winter just would not cooperate. I had to tarp the Keel
and add heaters to make sure the epoxy set. I felt it for three day
like this to make sure it was cured before I separated the keel.

Front of keel after separation. Lots of rust.


Tuesday, December 18, 2012

War of 1812
WE WON

Summer of 2013
 
Well its been awhile, I know.
We had a great sailing season this years and the weather was great, hot and lots of sun. We headed West this year and discovered the Western end of Lake Ontario. Or plan was to stay a few nights in as many Harbours as we could but this all changed when we pulled into Niagara on the Lake, our first stop. http://www.niagarasailing.on.ca/017/main.html We ended up staying seven nights on a Ball at Niagara on the Lake Marina. There was just to much to see and do in Niagara, biking and walking the town of Niagara on the Lake, Wine tours and of course sampling the wines. We have advanced from beginner samplers to the more professional approach of sampling. The difference being we sample by the bottle not by the glass!

After our seven day wine tour we spent the next week Gunk holing back to our home Port of Port Whitby. On our return trip we sailed into a flotilla of sailboats participating in the Golden Horse rally. http://www.ghyra.org/ This rally is more geared to the cruiser and not the racer and these sailors were having way to much fun for Vick and I not to join in 2013. So if the Stars are aligned next year we plan on joining this six day festival. On our last day of sailing Vicki had her first real taste of really bad weather. We came through it with fling colours and she can add it to her resume. This was a storm that would have seen most sailing couples parting ways when it comes to sailing. We hove to and went down below and had a hot lunch until the storm passed. I am a lucky guy!!

The boat projects are still ongoing and I am getting tired of talking about them but I keep telling myself its better to do them up here than try and do them down South. One thing I have found is that Sailors in Canada are getting it up the ASS when it comes to prices. As soon as something comes across the boarder you can add 15 to 20% to the price as compared to the USA price. Free Trade, Bull Shit! I have decided that I will do all the structural refits in Canada and wait until we take the boat South to purchase the other items. That is as long as our dollar stays strong.

Vicki in Heaven


Life Sling required in 3 knots of current on Niagara River


New Friends


Fall and winter project for Zingara

- refinish sole flooring as well as adding storage under floor.

- replacing sanitary lines in forward head, aft head was done in winter 2011.

- reinstall A/C

- Cut out anchor locker and re-design new one. The present one is to shallow to add a Windless.

- remove, re-bed and reseal Keel, this is a biggie and I will post a blog on this alone.

This should keep me out of trouble for the winter, fingers crossed. (:

Vicki and I wish all a MERRY CHRISTMAS and Happy New year and hope see you on the water.

D&V

Sunday, December 4, 2011

Summer of 2011

Shoestring


Congratulations go out to the Captain and Crew of the sailing vessel Shoestring who just finished a 3000 nautical mile voyage from Whitby Ontario to Nassau Bahamas. Great job Guys!! You can read about their trip by clicking on the link at the left of the page.


Summer 2011

After Zingara was launched in the spring of 2011 it was time to move back on board for the summer and GO SAILING. My first sail however would not be on Zingara but rather on a friends boat named Coracle. David & Karen had built this boat, over seven years, in the town of Minden Ontario; you can’t get any more land locked then that. The boat is a 54’ Bruce Roberts Spray design and made of steel. They had Coracle trucked to Whitby were they launched her and then spent the summer outfitting her. In the fall of 2010 they headed out for their knew home in Bayside Nova Scotia. Due to bad weather they were forced to haul Coracle in Gasp Bay were they left her for the winter. In the Spring of 2011 Jennot, Gord and myself joined Dave & Karen in Gaspe bay to help sail her home. Here are a few pictures of the trip.


Another sunset


Now that is a Travel Lift


Confederation Bridgle PEI


Pierce Rock

Lake Ontario 300


Once home from the East coast it was time to finish re-building the mast and stepping and tuning her. After this it was time to go sailing again, and again not on Zingara. It was time for the annual Lake Ontario 300. This is a race around Lake Ontario and as its name indicated its 300 nautical miles non-stop around Lake Ontario. The boat that I race on is a 1978 Viking 33’, old but very fast!!!! Much like me, old that is. Her are a few pictures.

Definition of sleep depravation, you will sleep anywhere


Zingara’s turn to sail

(or should I say Vicki’s)

Our holidays would take us east to the 1000 islands of Kingston and Gananoque for two weeks. Three other boats from our pier and Terry & Christine from pier 7 all headed out at the same time. We spent the next two weeks bumping into each other in different anchorages. Here are a few pictures of our trip.


Zingara & Jasah anchoured at Yeo Island


Ivy Lee bridge- Vicki don't look up


After the storm


No its not the North Channel its the 1000 Islands


Tuesday, November 29, 2011

Still alive and well in Port Whitby

Hello remember use. I know , I know you thought we had sailed off the end of the earth but in actual fact we are safe and sound, still, at Port Whitby Marina. Its been over a year since our last blog and a lot of work has been done to Zingara. I will give you a pictorial chronology of the work because it would take me a week to type it all out for you. We will start back in the fall of 2010 when Zingara was hauled for the winter and move forward to present.


Winter cover
I made myself a promise that I wouldn't get caught with my cover down like we did the first winter in Midland.  I got a few quotes on winter covers and was shocked at the prices, 1 boat unit for a cover I would cut up and through out in the spring. ( 1 boat unit = $1000.00 )  After a little research I used PVC conduit and 6 mill poly.  This is the same poly that they use for vapour barrier in home constrution.  It acts the same as the white plastic that you see covering all the boats in the yards.  It cost me about $250, this included the PVC conduit which I will use again and again.  This year it will only coast me $80 for the plastic.

Installing PVC tubeing for cover


Clear 6mm plactic used for cover


Bottom Job
One of the BIGGEST jobs that you can do on a boat is the bottom and I am not taking about just painting it.  What I had to do to Zingara was scrap all the old paint off and then re-paint her.  I found that there were three coats of old paint that had to come off, 1 coat of VC Tar, 1 coat of VC-17 and one coat of blue Micron CSC.  I did this by hand and it took me about 2 weeks to complete.  I then had to sand the gelcoat with a 50 grit sandpaper The keel was another issue.  Someone had covered the keel in fiberglass which was starting to peel away from the cast iron keel.  This turned out to be more work then I first though.  Once I had ground the fiberglass off I found 1/4" of fairing componed that also had to be ground off as well.  I then had to re-do the fairing to my satisfaction which required 2 gallons of fairing compound.  The re-paint was 7 coats of Interpertect 2000 and 3 coats of Micron CSC.
Bottom sraped to gel-coat

Fiberglass removed from Keel


Two patches to repair stress cracks

Once I had removed the old paint I found stress cracks on both Starboard and port sides below the water line .  I believe this was caused be the aft lifting point being to far aft.  Here is a picture of the two fiberglass patches that I installed.


Spring 2011 ready for launch

Putting Rudder back in


I removed the Rudder in the Fall of 2010 to inspect it.  Here we are installing it in the spring.


I addition to the bottom job I re-wired the Nav Station.  Here is a picture after I removed the breaker panel.  I will post a picture of the finished Nav Station in my next blog.
I also rebuilt the Mast in the spring of 2011, new LED lights and wiring added.
Hard at work

Special thanks to Jennot(pictured above) for all the help!

Saturday, November 27, 2010

Annapolis Reality Check

boats, boats and more boats
Have you ever had that feeling that what you are doing is just not right, not meeting with the status quo.  I get this feeling every now and then when it comes to the lifestyle that Vicki and I have chosen.  You know what I mean, living on a boat, not having a Ground Zero! 
Well I had a reality check in October when Vicki and I and our good friends Christine and Terry Vos visited the Annapolis Strictly Sail boat show in Annapolis Maryland.  This is toted as the biggest in-water sailboat show in the world and so far it is the biggest boat show that I have been to.  Thousands of people walking the docks looking at all the shiny new boats and gear.  This, however, wasn't the reality check that I am talking about.  You see, Annapolis is located at the top of the Chesapeake Bay and is on the direct flight path or should I say sail path for cruisers heading south.  They pool up in Annapolis to take in the show and to purchase all their forgotten items before heading south and beyond.  You can pick them out of the masses as they zig zag through the crowds, they are intent, they have a purpose and they are on a mission.  Not like the Perfect Sailors and Boat Babes that are there just to be seen.  You know what I mean, she has the perfect hair, perfect nails, dressed to the nines and is way too perky and symmetrical for her age, not that I was looking.
We picked up our Mack Pack main sail handling system as well as a few other smaller items.  The weather was in the mid 80's all week and the sea food was the best.  I was working my way up to the raw oysters but ran out of time, maybe next year we will stay for two weeks!

Vicki loving the seafood
We hauled Zingara out of the water and  I installed a proper cover this year.  I try to forget last winter when we didn't have a cover and had to shovel our way into the boat to work on her.  The major project for this winter will be refinishing the bottom, replacing the through hauls and ball valves.  I will be re-wiring the electrical panel as well as installing the SSB and pactor modem.  I have to reinstall the A/C unit as it was installed in the aft cabin and it is a little too noisy to sleep with as well as inefficient, not to mention the fact that Vicki was losing a whole clothes cupboard!  I will be installing it under the settee in the main salon.  I have also dropped the Mast and will rewire it in the spring.  I also removed the rudder at haul out to inspect it.

Zingara covered and ready for the winter
Vicki and I are now living the life of CLOD's (cruisers living on dirt) and I for one don't mind it.  I didn't like walking like a penguin down the dock at 6 am.
Have a great Christmas and Happy New Year

Saturday, October 16, 2010

Summer of Vicki
Once again the summer has come and gone and we are only left with memories.  You must agree though that this summer has been much warmer and drier then last year.  We had a great first summer on Zingara with many trips on Lake Ontario.  We have sailed to Toronto Island and Coubourg a number of times and have day sailed out of Whitby harbour as well.  We've made many new friends as well as reacquainting with old friends. 
Some of our new friends are David and Karen on the boat named Coracle.  Coracle is a Bruce Roberts designed sailboat of steel construction.  David and Karen built the boat by themselves in the town of Mindon, Ontario and trucked it to Whitby to launch.  They are leaving shortly to sail their boat to their new home in Nova Scotia.
As well as meeting David and Karin we reconnected with Bob and Connie Benner and their boat Meredith.  I met Bob and Connie about ten years ago during a Power Squadron course I took back in London, Ontario.  Vicki and I bumped into, or should I say sailed into them, in Port Stanley on lake Erie a few years  later.  On one of our sails to Toronto this year we called into the Marina to confirm our dockage, and we were told to dock at dock 40 beside a sailboat named Meredith.  Vicki and I both looked at each other and said it couldn't be the same Meredith.  There is no mistaking the lines of a 38' Cabo Rico sailboat and sure enough we were once again docked beside our old friends Bob and Connie.  I will add Bob and Connie's blog, Benner Adrift, to our  Links.  They have spent the last few years sailing up and down the east cost of the US, as well as the Bahamas and Cuba.  Bob has a way with words that at times will have you crying with laughter. 
Boat Projects!
I have taken it easy this summer, Vicki says too easy, when it comes to working on Zingara.  I have been sizing up the work that needs to be done.  A lot of the projects run into each other, I mean in order to do one thing you first have to do another project first. 
One project I did do this year was to install a Tank Monitoring system.  I have read with interest how boaters have problems with their Heads and the ensuing crap they get into when they go to fix the head.  The problem we had on Zingara was we didn't know when the tanks were full or empty.  This caused the forward holding tank to overflow into the boat.  The tank lid was cracked which allowed it to overflow into the bilge of the boat, not a pretty site or even worse SMELL.  Not to get into a lot of detail the tank is fixed and a Profile Tank Monitoring system is now on board Zingara.  I spent a week continuously washing my hands after the project was done.
Winter 2010/2011
Vicki and I have decided to pull Zingara out of the water for the winter instead of living aboard her.  I have to strip the bottom and also change the plastic through hulls and valves to bronze, as well as redo the electrical, move the A/C, the hot water tank, and the water pump, add an accumilator, install my SSB, re-bed the hatches and windows, S@$**$@*%T.